
How to Level a Refrigerator Properly: Easy DIY Guide
Learn how to level a refrigerator properly with this easy step-by-step guide. Fix uneven doors, wobbling, vibration, and other common leveling problems.
APPLIANCE CARE
9/13/20264 min read

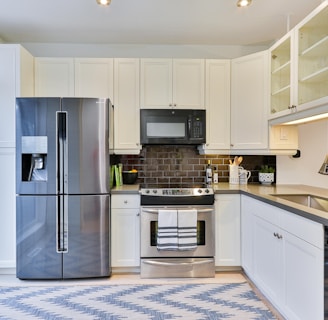
A refrigerator that is not level can wobble, vibrate, make unusual noises, or have doors that do not close correctly. In some models, improper leveling can also affect drainage and the operation of the ice maker or water dispenser.
Fortunately, leveling a refrigerator is usually a straightforward process. With a level and a few minutes of adjustment, you can make the appliance stable and properly aligned.
Why Is It Important to Level a Refrigerator?
Refrigerators are designed to operate on a stable, properly adjusted base. Leveling helps ensure that:
The refrigerator remains stable.
Doors open and close properly.
Door seals make proper contact with the cabinet.
The appliance operates with less vibration.
Water and ice-making components function correctly on applicable models.
The refrigerator maintains proper alignment with surrounding cabinets.
Many refrigerators are intentionally adjusted so the front is slightly higher than the rear. This can help the doors swing or close naturally, but the correct adjustment depends on the model.
What You Need to Level a Refrigerator
Before starting, gather:
A bubble level or spirit level
A wrench or adjustable wrench, if required
A flashlight
Someone to help if the refrigerator needs to be moved
Some refrigerators have leveling feet that can be turned by hand, while others require a wrench or screwdriver.
Step 1: Position the Refrigerator
Move the refrigerator into its intended location before making the final leveling adjustments.
Leave enough clearance around the appliance according to the manufacturer's instructions. Avoid pushing it tightly against the wall because the refrigerator may need space for ventilation.
Make sure the refrigerator is sitting on a solid, reasonably level floor.
Step 2: Check the Refrigerator From Side to Side
Place the level on a flat surface inside the refrigerator or on a suitable flat section of the cabinet.
First, check the appliance from left to right.
If the bubble is not centered, one side of the refrigerator needs to be raised or lowered.
Step 3: Locate the Leveling Feet or Rollers
Look underneath the front of the refrigerator.
Depending on the model, you may find:
Adjustable leveling feet
Front leveling legs
Adjustable rollers
A combination of rollers and leveling feet
Some refrigerators have a decorative bottom grille or kick plate that needs to be removed to access the adjustment mechanism.
Consult the owner's manual if you're unsure where the leveling mechanism is located.
Step 4: Adjust the Leveling Mechanism
Turn the appropriate leveling foot or adjustment screw slowly.
Usually, turning the adjustment mechanism in one direction raises that corner, while turning it in the opposite direction lowers it. The exact direction varies by model.
Make small adjustments rather than turning the mechanism several rotations at once.
After each adjustment, check the level again.
Step 5: Check the Refrigerator From Front to Back
Once the refrigerator is level from side to side, check it from front to back.
Place the level on a suitable surface and check whether the cabinet is leaning forward or backward.
Some manufacturers recommend having the front slightly higher than the rear. Don't assume that completely leveling the refrigerator in every direction is correct—follow the manufacturer's recommended specifications.
Step 6: Check for Stability
Gently push against the refrigerator from different directions.
It should remain stable without rocking.
If it moves or rocks, adjust the leveling feet until all required contact points are stable.
Avoid using pieces of cardboard, wood, or other improvised materials underneath the refrigerator unless the manufacturer's instructions specifically permit them.
Step 7: Check the Doors
Open and close the refrigerator doors several times.
The doors should:
Open smoothly
Close completely
Remain properly aligned
Make consistent contact with the door gasket
Some refrigerators are designed so the doors naturally swing toward the closed position when released.
If the doors are still uneven or don't close correctly, make small additional adjustments.
Step 8: Reinstall the Bottom Grille
If you removed the lower grille or kick plate to access the leveling mechanism, reinstall it after completing the adjustment.
Make sure it is securely attached and isn't rubbing against the floor or other components.
How to Level a Refrigerator With Wheels
Some refrigerators use adjustable front rollers rather than traditional leveling feet.
The adjustment process is similar. Locate the adjustment screw or mechanism and turn it gradually while checking the refrigerator with a level.
Do not confuse ordinary rear transport wheels with adjustable leveling mechanisms. The owner's manual will indicate which components are designed for adjustment.
How to Tell if Your Refrigerator Is Not Level
Several signs may indicate that your refrigerator needs leveling.
The Refrigerator Rocks
If the cabinet moves when you open a door or apply gentle pressure, the leveling feet may need adjustment.
The Doors Are Uneven
A door that appears noticeably higher or lower than the other can sometimes indicate an adjustment issue. However, some models have separate door-adjustment mechanisms, so leveling isn't always the solution.
The Doors Don't Close Properly
If the refrigerator door remains open or doesn't naturally move toward the closed position, check the refrigerator's leveling and the door seal.
Excessive Vibration or Noise
An unstable refrigerator can transfer vibrations to the floor and surrounding cabinets, making normal operating sounds seem louder.
Can an Uneven Floor Cause Problems?
Yes. Kitchen floors are not always perfectly level, especially in older homes.
If the floor slopes significantly, the refrigerator's leveling mechanism may compensate for some of the difference. However, the appliance should remain within the adjustment range specified by the manufacturer.
If you cannot stabilize the refrigerator using its built-in adjustments, don't improvise a support system. A qualified appliance technician or contractor can determine the appropriate solution.
Tips for Leveling a Refrigerator Safely
Keep these precautions in mind:
Have another person help if the refrigerator needs to be moved.
Avoid tipping the refrigerator unnecessarily.
Don't place your fingers underneath the appliance while adjusting or moving it.
Make small leveling adjustments.
Don't force a leveling screw that appears stuck.
Follow the manufacturer's instructions for the correct front-to-back angle.
Make sure the refrigerator is stable before leaving it unattended.
What Happens if a Refrigerator Is Not Level?
A refrigerator that is slightly out of level may continue operating normally, but significant misalignment can create practical problems.
The doors may not close correctly, the appliance may rock or vibrate, and certain features may not operate as intended. For refrigerators equipped with ice makers or water systems, proper positioning can also be important for reliable operation.
Final Thoughts
Leveling a refrigerator is an important part of proper appliance installation and maintenance. Start by checking the refrigerator from side to side and front to back, then use the built-in leveling feet or rollers to make small adjustments.
Once the refrigerator is stable, verify that the doors close properly and that the appliance doesn't rock or vibrate excessively.
Because leveling mechanisms differ between refrigerator brands and models, always check the manufacturer's instructions for the recommended adjustment method and front-to-back position.