
How to Clean Refrigerator Condenser Coils Safely at Home
Learn how to clean refrigerator condenser coils step by step. Improve cooling, save electricity, and prevent breakdowns with this easy DIY guide.
DIY
2/5/20262 min read

If your refrigerator is running hot, making more noise than usual, or increasing your electricity bill, dirty condenser coils could be the reason. Condenser coils release heat from your fridge. When they are covered with dust, pet hair, and debris, the refrigerator has to work harder.
The good news is that cleaning refrigerator condenser coils is simple and can be done at home in less than 30 minutes.
What Are Refrigerator Condenser Coils?
Condenser coils are metal tubes located:
Behind the refrigerator, or
Underneath the refrigerator, behind a front grill
Their job is to release heat absorbed from inside the fridge. When airflow is blocked by dirt, cooling efficiency drops.
Why Cleaning Condenser Coils Is Important
Dirty condenser coils can cause:
Poor cooling or warm fridge
Longer compressor run time
Higher electricity bills
Overheating and early compressor failure
Shorter refrigerator lifespan
Cleaning them once or twice a year keeps your refrigerator efficient and reliable.
Tools You Will Need
Coil cleaning brush (or soft bottle brush)
Vacuum cleaner with brush attachment
Microfiber cloth
Flashlight (optional)
Screwdriver (if grill removal is needed)
Step-by-Step: How to Clean Refrigerator Condenser Coils
Step 1: Unplug the Refrigerator
Always unplug the refrigerator before cleaning. This prevents electric shock and protects internal components.
Step 2: Locate the Condenser Coils
Pull the refrigerator away from the wall if coils are at the back
Remove the bottom front grill if coils are underneath
Use a flashlight to see dust buildup clearly.
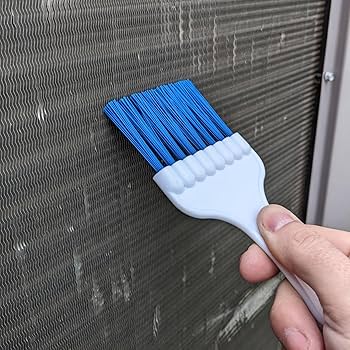
Step 3: Brush Off Loose Dirt
Gently brush the coils using a coil cleaning brush. Move slowly to avoid bending or damaging the coils.
Tip: Brush in the direction of the coil lines, not against them.
Step 4: Vacuum the Debris
Use a vacuum cleaner to remove loosened dust, pet hair, and debris from around the coils and floor area.
Make sure the surrounding area is clean so dirt does not get pulled back onto the coils.
Step 5: Wipe Surrounding Areas
Use a microfiber cloth to clean nearby surfaces, vents, and the grill. This helps maintain airflow.
Step 6: Reassemble and Plug Back In
Reattach the grill if removed
Push the refrigerator back into place, leaving some space for airflow
Plug the refrigerator back in
The fridge may take a few hours to return to normal temperature.
How Often Should You Clean Condenser Coils?
Every 6 months if you have pets
Once a year for normal households
More frequently in dusty environments
Regular maintenance prevents costly repairs.
Signs Your Condenser Coils Need Cleaning
Refrigerator feels hot on the sides
Compressor runs constantly
Food not staying cold
Unusual humming or buzzing noises
Sudden increase in electricity bill
Important Safety Tips
Never use water directly on coils
Do not bend or damage coil fins
Avoid sharp tools
Do not clean while the refrigerator is plugged in
Cleaning refrigerator condenser coils is one of the easiest and most effective maintenance tasks you can do. It improves cooling performance, reduces energy consumption, and helps your refrigerator last longer.
If your refrigerator still has cooling issues after cleaning the coils, the problem may lie with the fan motor, compressor, or thermostat and may require professional service.
Read More:
Refrigerator fan not working: How to fix it